Turning your art into a sticker business is not just a dream—it’s a way to share your creativity with the world and make some extra cash while you’re at it. Whether you’re doodling in your sketchbook or creating digital masterpieces, there’s something truly special about seeing your artwork transformed into cute, fun, and stylish stickers that others can enjoy.
But where do you start? It might seem a little overwhelming, especially if you’ve never run a business before. Don’t worry, though—I’m here to help you every step of the way! From preparing your designs to figuring out how to make or order your stickers, and even deciding where to sell them, this guide has you covered.
Table of Contents:
Step 1: Preparing Your Artwork
The first step to launching your sticker business is ensuring your artwork is ready to shine. Whether you’re working with hand-drawn illustrations or digital designs, your goal is to make sure they translate beautifully into stickers. Here’s how to get started:
1. Choose Your Art Style
Your art style is your signature—it’s what makes your stickers uniquely yours. Start by choosing a niche that aligns with your interests and resonates with your target audience. Whether you focus on cute and whimsical characters, bold graphic patterns, detailed illustrations, or minimalist designs, your niche will help define your brand’s identity. Once you’ve chosen your niche, ensure your style consistently reflects your personality and brand. This consistency not only strengthens your brand’s identity but also helps build recognition and loyalty among your customers.
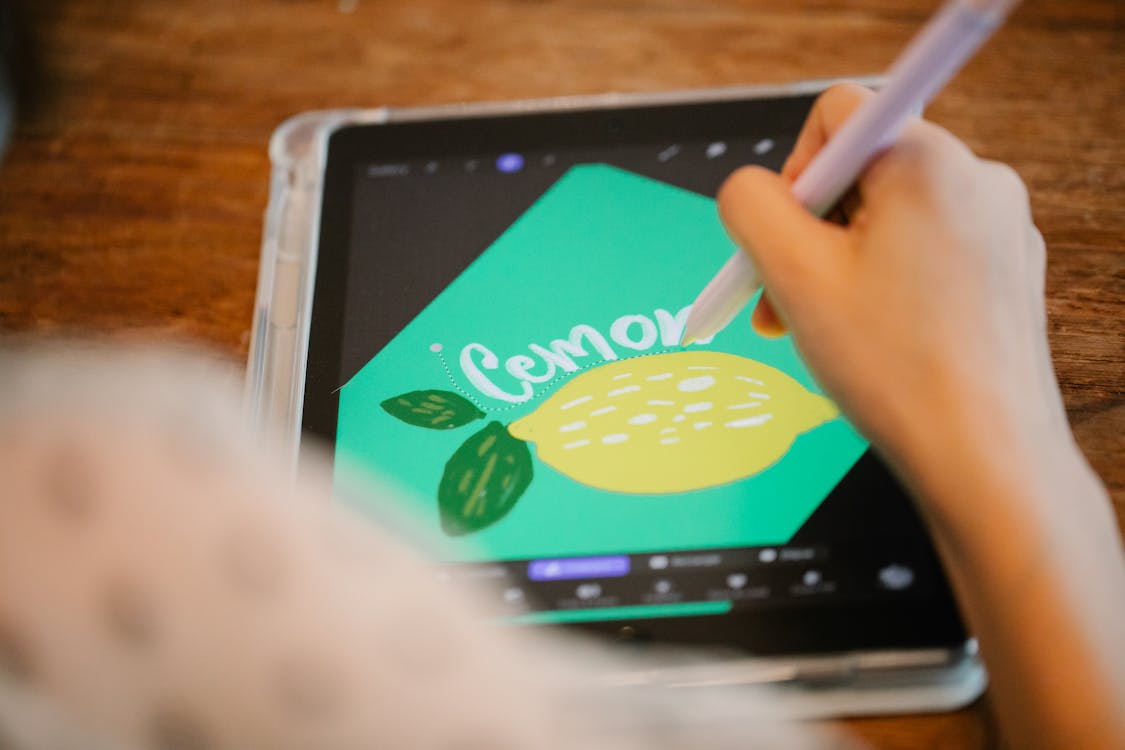
2. Use the Right Software
If you’re creating digital designs, tools like Adobe Illustrator, Procreate, or free programs like Inkscape are ideal for sticker creation. These programs allow you to work with vectors, which are scalable without losing quality. For hand-drawn artwork, scan your drawings at a high resolution and clean them up in software like Photoshop. Don’t forget to remove any background if you want transparent edges on your stickers!
Key Skills to Learn:
- Working with Layers: Manage different parts of your artwork separately for easier editing and refinement.
- Color Adjustments: Ensure your designs look vibrant and true to your original vision when printed.
Recommended Software:
- Paid: Clip Studio Paint EX, Photoshop, Illustrator, Procreate.
- Free: Krita, Inkscape.
3. Create Themed Sticker Sets
Consider creating sticker sets based on different themes. This adds variety to your shop and gives customers the option to buy coordinating stickers. For example, you could design sets featuring kittens, magic and witchcraft, or seasonal elements like autumn leaves. Themed sets can be marketed as collections, making them appealing as gifts or for personal use.
4. Optimize Your Designs for Stickers
Stickers are small, so your designs need to be clear and impactful even when scaled down. Whether hand-drawing or working digitally, focus on creating clean lines, bold shapes, and vibrant colors. Use high-resolution images (at least 300 dpi) to ensure your stickers look sharp, and simplify intricate details that might not translate well to a smaller size.
When you’re designing each sticker, it’s important to think about how it will be cut. Most cutting machines, like Cricut, Silhouette, or plotters, need a certain border or ‘bleed’ around the design. This helps the machine make a clean cut and ensures your stickers look professional without any unwanted white edges.
If you’re unsure how to add this border in your design software, don’t worry! There are plenty of free tutorials on YouTube that can show you how, whether you’re using Photoshop, Procreate, or another program. Taking a little time to learn this will make a big difference in the quality of your stickers.
5. Finalize Your Designs
Before sending your designs to print, ensure everything is set up correctly. Save your files in the appropriate format—.PNG for transparent backgrounds or .PDF for print-ready versions. Check that your colors are in CMYK mode, which is ideal for printing, and confirm that your resolution and file size meet the requirements.
Step 2: Setting Up Your Business
1. Naming Your Shop
Choosing a name for your sticker shop is one of the fun parts of starting your side hustle! Your shop name is like your brand’s first impression, so it’s important to pick something that feels right for you. Here’s how to get started:
- Reflect Your Brand and Style: Think about the kind of stickers you’re creating and the vibe you want to project. Whether you’re into cute and whimsical or sleek and modern, your shop name should give a hint of what’s to come. Choose something that feels personal and unique to you.
- Check Availability: Once you’ve got a few name ideas, make sure they’re available. Do a quick Google search and check social media platforms to see if anyone else is using the same name. You’ll also want to check if the domain name is available if you’re thinking of setting up a website later on.
- Reserve Your Name: While registering your business name with the state can be important down the line, for now, you might just want to reserve your name on social media platforms and purchase the domain if possible. This way, you can start building your brand and secure your chosen name early on.
2. Legal Considerations
- Consider Forming a Legal Entity (LLC): Creating a Limited Liability Company (LLC) can be a smart step for many small business owners. It helps protect your personal assets by separating them from your business assets, which can be valuable if you ever face legal challenges. It’s worth looking into as you grow your business.
- Get an EIN: An Employer Identification Number (EIN) is like a Social Security number for your business. It’s necessary for tax purposes and can help you open a business bank account, apply for licenses, and hire employees if needed. You can apply for an EIN easily through the IRS website, and it’s a good idea to get one early on.
- Keep Your Finances Separate: Keeping your personal and business finances separate is important. Consider opening a business bank account to handle all your business transactions. This helps make bookkeeping easier and keeps your personal finances protected.
- Think About Hiring an Accountant: Handling taxes and bookkeeping can be tricky. As your business grows, you might find it helpful to hire an accountant. They can assist with managing your finances, ensuring you comply with tax laws, and saving you time and stress.
- Trademark Your Brand Name: As your sticker business starts to gain traction, you might want to think about trademarking your brand name. This step helps protect your brand by preventing others from using a similar name or logo. It’s something to consider as your business expands and establishes itself in the market.
Step 3: Manufacturing Your Stickers

Now that your artwork is prepped and ready, it’s time to bring your designs to life as beautiful, high-quality stickers. This step can feel a bit overwhelming, but don’t worry—I’m here to guide you through it. Whether you choose to print them yourself or work with a professional printing service, here’s everything you need to know about manufacturing your stickers.
1. Printing at Home vs. Outsourcing
One of the first decisions you’ll need to make is whether you want to print your stickers at home or outsource to a professional printing service. Both options have their pros and cons:
- Printing at Home: If you want complete control over the process and flexibility with small batches, printing at home might be the way to go. It’s ideal for hobbyists or if you’re just starting and want to keep costs low. However, keep in mind that the quality might not match professional printing, and you’ll need to invest in a good printer and materials.
- Outsourcing: Professional printing services offer high-quality results and can handle large orders with ease. If you’re serious about your sticker business and want the best possible outcome, this is the way to go. It might be more expensive upfront, but the quality and time saved can be well worth the investment.
2. Consider Dropshipping Options
If you’re looking to simplify the process even further, dropshipping can be a great option. This method allows you to avoid the hassle of printing, storing, and shipping your stickers. Instead, a dropshipping service takes care of everything, letting you focus more on the creative side of your business.
- Printify: Printify is a popular choice for dropshipping custom stickers and other products. It allows you to add thoughtful touches like a thank you card to each order, creating a more personalized customer experience. However, customization of the packaging is limited, so if that’s a priority for you, it might not be the best fit.
- Printful: For those who want to go the extra mile with custom packaging, Printful offers a unique option. You can order branded mailers in bulk from a supplier, send them to Printful’s warehouse, and they’ll use your custom packaging for your orders. This can help your brand stand out and create a memorable unboxing experience. However, it’s important to note that this adds additional costs to your sticker production, which might not be feasible for everyone, especially when starting out.
- Other Providers: There are other dropshipping providers with varying levels of customization and costs. It’s worth researching to find one that aligns with your brand’s needs and budget.
3. Choose Your Materials
Choosing the right sticker paper is one of the most important decisions when starting a sticker shop. The material you choose will impact their durability, appearance, and overall feel. Here are some options to consider:
- Vinyl: Vinyl is the most popular choice for stickers because it’s durable, waterproof, and has a professional finish. It’s great for both indoor and outdoor use, making it a versatile option.
- Paper: Paper stickers are cheaper and work well for indoor use. They’re perfect for packaging, planners, or any application where the sticker won’t be exposed to moisture or heavy wear. However, the quality of paper stickers can vary, so testing different brands is advisable.
- Clear: Clear stickers offer a unique look, allowing your design to blend seamlessly with the surface it’s applied to. They’re often used for a sleek, modern aesthetic and can enhance the visual appeal of your designs against various backgrounds.
- Matte or Glossy Finish: Decide whether you want your stickers to have a matte or glossy finish. Glossy stickers have a shiny, vibrant look, while matte stickers offer a more subtle, muted look.
For high-quality paper that’s popular in the sticker community, Online Labels’ Weatherproof Matte Sticker Paper is a recommended choice. It’s known for its smooth texture and is often referred to as “premium matte” or “unicorn paper” due to its excellent quality.
If you’re unsure which paper to choose, consider ordering free samples from suppliers like Online Labels or Sheet Labels. Testing out a few options will help you find the best match for your designs and ensure compatibility with your printer.
4. Printing Methods
Depending on whether you’re printing at home or outsourcing, there are different methods to consider:
- Inkjet or Laser Printers (for Home Printing): If you’re printing at home, an inkjet printer is typically the best choice for vibrant colors and detailed images. Inkjet printers are particularly effective for color-rich designs and are compatible with a wide range of sticker papers, including vinyl, matte, and glossy finishes. However, if you’re looking to create foiled stickers, you’ll need a laser printer, as the heat from the laser printer is necessary to apply the foil properly. Laser printers also offer faster printing speeds and produce smudge-resistant results, making them ideal for high-volume printing.
- Digital Printing: Most professional printing services use digital printing, which is cost-effective for small to medium runs. Digital printing offers high-quality results with vibrant colors and is versatile enough to handle various types of sticker materials, including vinyl and clear stickers.
- Offset Printing: If you’re planning to print a large quantity of stickers, offset printing is the most economical option. This method provides exceptional color accuracy and quality, making it a preferred choice for large orders. Offset printing is generally more cost-effective when producing large batches of stickers, so it’s ideal for businesses with high demand.
- Printer Recommendations: For home printing, the Canon Pixma line is highly recommended for its excellent color payoff and reliability. Although some models may be discontinued, the Canon Pixma series remains a strong choice for producing high-quality inkjet prints. Additionally, consider refilling your ink cartridges with third-party inks to reduce costs—many tutorials are available online to guide you through the process.
5. Sticker Cutting Methods
Sticker Cutters:
A sticker cutter is a vital tool for anyone serious about making stickers. The most popular options range from simple desktop machines to more advanced plotters.
- Silhouette Portrait:
For beginners, the Silhouette Portrait is a fantastic option. It’s one of the most affordable cutting machines on the market and is perfect for small businesses or hobbyists. While there is a bit of a learning curve, with good lighting and practice, it becomes easy to use. The Silhouette Portrait is great for cutting a wide variety of sticker designs, but be mindful of the setup and adjustments needed to get the best results. - Cricut: Another popular option is the Cricut cutting machine, known for its user-friendly interface and versatility. Cricut machines are widely used for a variety of crafting projects, including stickers. They offer precise cuts and can handle intricate designs with ease. The Cricut is a great choice if you want a machine that’s easy to use right out of the box, with plenty of online resources and a strong community of users for support.
- Plotter Machines:
If your business involves high-volume production of unfoiled stickers, a plotter might be worth considering. Plotters can handle larger sheets and continuous rolls of stickers, making them more efficient for large-scale operations. However, they may not be suitable if your stickers are foiled or require intricate designs, as they typically cater to simpler, non-foiled stickers.
Pre-Cutting vs. Manual Cutting:
- Pre-Cutting:
Many professional printers offer pre-cutting services, where the stickers are cut during the printing process. This can be done using die-cutting or kiss-cutting methods:- Die-Cutting: Cuts through both the sticker material and the backing paper, resulting in individual stickers that are easy to peel off.
- Kiss-Cutting: Cuts only through the sticker material, leaving the backing paper intact. This method is ideal for creating sticker sheets with multiple designs that customers can peel off individually.
- Manual Cutting:
If pre-cutting isn’t an option, you might choose to cut the stickers yourself. This can be more labor-intensive but adds a personal touch and allows you to ensure each sticker is perfectly cut before shipping. Manual cutting is often done with the help of smaller machines like the Silhouette Portrait.
Choosing the Right Cutter:
When deciding on a cutting machine, consider the volume of stickers you plan to produce and the complexity of your designs. For smaller businesses or those just starting out, the Silhouette Portrait offers a good balance of affordability and functionality. For larger operations, especially those producing unfoiled stickers, a plotter might be a better investment.
6. Printing and Quality Assurance
Once you’ve finalized your designs and selected a printing service, it’s crucial to ensure the quality of your stickers meets your standards. Follow these steps to achieve the best results:
Choosing and Testing Your Printing Service
- Research and Compare: Look for printing services specializing in stickers, such as Sticker Mule, StickerYou, or Vistaprint. Compare their prices, reviews, and quality.
- Order Samples: Before committing to a large order, request samples from several printers. This allows you to evaluate the quality, finish, and customization options like die-cut shapes or different finishes.
- Check Customization Options: Ensure the printer offers the customization you need, such as specific sizes, finishes, or die-cut shapes. If sustainability is important, check for eco-friendly materials and inks.
Preparing for Print
- File Settings: Verify your file settings, including resolution, color mode (CMYK), and any bleed or margin requirements specified by the printer.
- Test Prints: Print a few samples at home or order a small test batch from your chosen printer to check how your designs translate into stickers and make necessary adjustments. Evaluate the print quality, colors, and cuts. If using a dropshipping service, make sure everything’s good with the packaging, too.
With your stickers tested and quality assured, you’re ready to proceed with launching your business!
Step 4: Selling Your Stickers

1. Pricing
It’s important to set the right price for your stickers. Start by researching similar products in your niche to understand the market rate. Consider your costs, including materials, labor, packaging, and shipping, and ensure you’re pricing your stickers to cover these while also making a profit. Don’t undervalue your work; remember to factor in the time and effort you put into designing and creating each sticker.
2. Where to Sell
- Etsy: Etsy is a great platform for artists and creators to sell handmade products. It’s user-friendly, and the community is already primed to look for unique and creative items. Offering variations, such as different sizes or bundles, can also help attract more buyers. Check out my comprehensive guide on how to start an Etsy shop.
- Wholesale Platforms (like Faire): Once you’ve established your brand, consider expanding to wholesale platforms like Faire. These platforms allow you to sell in bulk to retailers, which can significantly boost your sales. However, wholesale pricing will require you to offer discounts compared to retail pricing, so plan your costs accordingly.
- Your Own Web Shop: Having your own web shop gives you complete control over your brand, customer experience, and pricing. Platforms like Shopify and WordPress offer customizable templates and tools that make setting up an online store straightforward. This option requires more upfront investment in terms of time and possibly money, but it allows you to build your brand independently. While Shopify is more beginner-friendly, it can be pretty costly in comparison to WordPress, and it doesn’t offer as much customization. If you’re going for WordPress, I highly recommend Hostinger for a pretty affordable and high quality hosting service. Click here for my special discount link.
- TikTok Shop: TikTok Shop is a platform where you can sell products directly to your audience through the app. This is particularly beneficial if you already have a strong presence on TikTok or plan to use video content to drive sales. The platform’s algorithm can help you reach a broader audience organically.
- Amazon and eBay: For more established sellers looking to scale, platforms like Amazon and eBay offer access to a vast customer base. Amazon, in particular, can be lucrative due to its massive reach, but competition is high, and fees can be significant. eBay is great for auction-style listings or selling limited-edition stickers. Both platforms require attention to detail regarding product descriptions, images, and customer service.
3. Marketing on Social Media
- Leverage Content Marketing: Instead of just posting product photos, create content that showcases your stickers in use, tells the story behind your designs, or offers tutorials on how to use them creatively. Engaging content can help build a community around your brand and drive more sales.
- Engage with Your Audience: Respond to comments, messages, and mentions. Engaging directly with your audience builds trust and encourages customer loyalty. Use polls, Q&A sessions, and live streams to interact with your followers in real time.
- Run Social Media Contests: Contests and giveaways can significantly boost your visibility. Encourage users to share your content or tag friends in exchange for a chance to win your stickers. This can lead to increased followers and potential customers.
- Utilize Hashtags Strategically: Research and use relevant hashtags to reach a broader audience. Don’t just use the most popular ones; find niche-specific hashtags where your content is more likely to be seen by interested users.
- Collaborate with Influencers: Partnering with influencers who align with your brand can introduce your products to their followers. This doesn’t always require a large budget; micro-influencers can be just as effective and often more affordable.
- Track and Analyze Performance: Use the analytics tools provided by social media platforms to track which types of content perform best. Adjust your strategy based on what resonates most with your audience, whether that’s certain types of posts, posting times, or engagement tactics.
Step 5: Shipping and Packaging
Once your stickers are printed and ready to go, it’s time to focus on shipping and packaging. This step ensures that your stickers arrive safely and look professional when they reach your customers. Here’s how to handle it:
1. Packaging Materials
- Protective Sleeves and Cellophane Bags: Use clear protective sleeves or plastic bags to keep stickers safe from moisture and dirt. These are especially useful for individual stickers or small sets. Cellophane bags are a popular choice as they are transparent and give your packaging a polished look, making your stickers appear well-presented and professional.
- Rigid Mailers: For larger orders or to ensure your stickers don’t get bent during shipping, use rigid mailers or cardboard envelopes. These provide extra protection and keep your stickers in pristine condition. They’re especially important if your stickers are being shipped long distances or need to be handled by multiple carriers.
- Custom Envelopes: Consider using custom envelopes that reflect your brand’s style. These envelopes can be as simple or as elaborate as you like, from colorful designs to branded prints. Custom envelopes not only protect your stickers but also serve as a branding tool that can delight your customers from the moment they receive their package.
- Bubble Wrap: For extra protection, especially for larger quantities or valuable items, wrap your stickers in bubble wrap. This adds cushioning and prevents damage during transit. Bubble wrap is particularly useful when shipping in bulk or when your stickers are part of a larger, more delicate order.
2. Labeling and Branding
- Custom Labels and Business Cards: Add a personal touch by including custom labels or business cards in your packaging. Custom labels can feature your logo, a thank-you message, or any other branding element that enhances the customer’s unboxing experience. Including a business card is a simple yet effective way to provide customers with your contact information, social media handles, or a discount code for their next purchase.
- Thank You Notes: Including a thank you note or a small freebie can make your customers feel appreciated and encourage repeat business. It’s a nice gesture that can enhance customer satisfaction and build a loyal customer base. Handwritten notes, in particular, add a personal touch that many customers love..
3. Shipping Options
- Shipping Carriers: Choose reliable shipping carriers like USPS, FedEx, or UPS based on your needs and budget. Compare rates and delivery times to offer the best options to your customers. For beginners, USPS is often a cost-effective choice for small packages, while FedEx and UPS might be better for larger orders or express shipping.
- Tracking: Provide tracking information for orders whenever possible. This keeps customers informed about the status of their shipment and helps reduce concerns about delivery. Offering tracking is a great way to build trust and keep customers updated, which can lead to better reviews and repeat business.
- International Shipping: If you plan to sell internationally, research shipping options and costs for different countries. Be aware of potential customs fees or restrictions that might affect your international customers. Offering international shipping can expand your market, but it’s important to clearly communicate any additional costs to your customers upfront.
4. Handling Returns and Exchanges
- Return Policy: Given that stickers are relatively inexpensive, you might want to consider implementing a no-returns policy. The cost of processing returns and exchanges may outweigh the benefits, especially for small orders. If you do decide to allow returns, clearly state your return and exchange policy on your website to help manage customer expectations.
- Packaging for Returns: If you do accept returns, make sure to include instructions for how to return items. Providing a return shipping label, if feasible, can make the process easier for your customers, though this might be less common for lower-cost items like stickers.
Conclusion
With your stickers designed, printed, and quality-checked, you’re all set to share your creations with the world! Enjoy the process of bringing your designs to life and best of luck with your sticker venture.