Want to turn your art skills into a profitable side hustle? Creating and selling Twitch emotes, panels, overlays and badges is a great way to combine your passion with income.
In certain live streaming platforms, especially on Twitch which is the one we’re going to be focusing on, visual branding is key to standing out. Streamers use custom emotes, badges, panels, and overlays to enhance their channel’s look, engage their audience, and build a unique identity. If you’re not a usual Twitch viewer, you might not be too familiarized with these concepts.
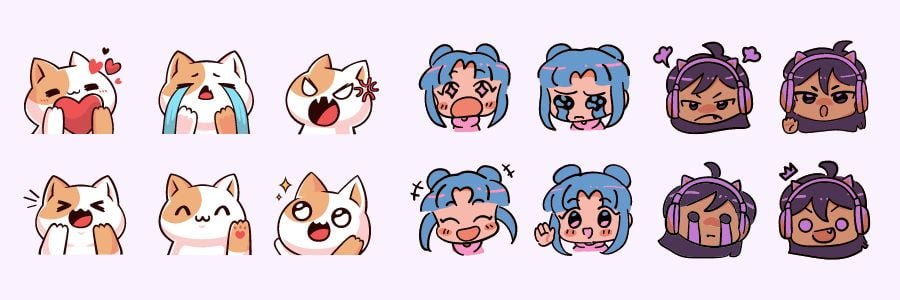
See, emotes are the small, expressive images used by viewers in chat, working just like emojis do. Panels provide organized information on a streamer’s page, so they’re those usually-rectangular shaped images used to separate sections by name, such as “About Me” and “Schedule.” Badges are the small icons next to a subscriber’s name in the chat, and overlays add visual flair to the stream itself. These digital assets have become essential tools for content creators, making them highly sought after.
Tools and Software You’ll Need
1. Hardware
You don’t necessarily need to go and buy a new device just to get started, but if you’re planning to go all in on graphic design, then you should at least start to consider it.
- Graphics Tablet: A graphics tablet can significantly enhance your drawing experience, giving you more control and precision compared to using a mouse. Tablets like Wacom or XP-Pen allow for pressure sensitivity, which can make your lines and strokes more dynamic and natural, especially useful for drawing emotes.
Prices vary widely depending on the brand and model, ranging from entry-level to professional-grade tablets.
- iPad with Apple Pencil: The iPad offers a portable and powerful solution for digital artists, especially when paired with apps like Procreate. It’s a go-to for many digital artists due to its responsiveness, ease of use, and portability. It’s perfect for on-the-go designing.
It requires a higher initial investment, but the versatility and convenience often justify the price.
2. Design Software
These are the most commonly used programs for the job.
1. Adobe Photoshop: The powerhouse for graphic design, offering a comprehensive suite of tools that allow you to create highly detailed and professional-quality graphics.
- Why It’s Great: Photoshop’s robust features, such as layer management, blending options, and a vast array of brushes, make it ideal for creating intricate emotes and detailed overlays.
- Cost: Photoshop is a subscription-based service, with pricing options ranging from a monthly fee for a single app to bundled packages with other Adobe products.
- Skill Level: Intermediate to advanced, though beginners can find plenty of tutorials online.
2. Adobe Illustrator: A vector-based software, perfect for creating scalable graphics that maintain quality at any size, which is especially useful for panels and overlays.
- Why It’s Great: Illustrator’s precision tools are ideal for creating crisp, clean designs that can be resized without losing quality, making it a top choice for panels and overlays.
- Cost: Like Photoshop, Illustrator is subscription-based with similar pricing plans.
- Skill Level: Intermediate to advanced.
3. Procreate: A popular app for iPad users, offering a tactile, intuitive design experience that’s great for drawing emotes and other digital art.
- Why It’s Great: Procreate’s user-friendly interface, combined with powerful drawing tools, makes it a favorite among digital artists. It’s particularly well-suited for creating emotes due to its smooth brush strokes and easy layering system.
- Cost: One-time purchase from the App Store, making it more affordable in the long run compared to subscription-based software.
- Skill Level: Beginner to advanced.
4. Affinity Designer: An affordable alternative to Adobe’s suite, offering vector and raster design capabilities in one app.
- Why It’s Great: It’s a one-time purchase with no subscription fees, making it a cost-effective option for those just starting. Its features are comparable to Illustrator, making it a solid choice for both emotes and overlays.
- Cost: One-time purchase, often at a fraction of the cost of Adobe’s products.
- Skill Level: Beginner to intermediate.
5. Canva: An online tool that offers easy-to-use templates and drag-and-drop features, making it accessible to non-designers.
- Why It’s Great: For those new to graphic design, Canva provides pre-made templates and a simple interface, making it easy to create panels and overlays quickly.
- Cost: Free with the option to upgrade to Canva Pro for additional features.
- Skill Level: Beginner.
6. GIMP (GNU Image Manipulation Program): GIMP is a free, open-source alternative to Photoshop, offering many similar features for creating and editing graphics.
- Why It’s Great: GIMP is a great option if you’re looking for a powerful, no-cost alternative to Photoshop. It can handle most tasks needed for creating Twitch graphics, although its interface may take some getting used to.
- Cost: Free.
- Skill Level: Intermediate.
7. Figma: A web-based interface design tool that’s becoming increasingly popular for collaborative projects.
- Why It’s Great: While Figma is more commonly used for UI/UX design, its vector editing capabilities make it a strong option for creating panels and overlays. Plus, its collaborative features are ideal if you’re working with others.
- Cost: Free with paid plans for additional features.
- Skill Level: Intermediate.
3. Resource Libraries
Access to quality resources can significantly streamline your design process. Here are some excellent libraries and marketplaces where you can find assets like fonts, icons, textures, and design elements to enhance your Twitch graphics:
- Creative Fabrica: A resource-packed platform with a vast array of digital assets, including fonts, graphics, and design elements. It’s particularly useful for finding creative and unique items that can make your Twitch graphics stand out.
- Envato Elements: A subscription-based service providing unlimited downloads of design assets, including illustrations, icons, and more, which can be incredibly useful for creating Twitch graphics.
- Adobe Stock: Provides high-quality images, vector graphics, and other assets that can be integrated into your designs. Ideal for creating polished and professional-looking Twitch graphics.
- FontBundles.net: Specializes in fonts, offering bundles and deals that can save you money while providing you with unique typography for your designs.
- Creative Market: Offers a vast selection of fonts, graphics, and templates, perfect for adding a professional touch to your emotes, panels, overlays, and badges.
- Google Fonts: Google’s very own free library of fonts that can be used in your designs for panels and overlays. It offers a variety of fonts to match different styles and themes, helping you customize your Twitch graphics.
- Unsplash and Pexels: These platforms offer high-resolution images that can be used as backgrounds or elements in your overlays. They’re completely free and offer a diverse range of images that can enhance the visual appeal of your designs.
These libraries can provide inspiration and resources, helping you create standout designs for your Twitch clients.
Creating Emotes, Panels, Overlays, and Badges
Now that you’re equipped with the right tools, it’s time to dive into the creative process. In this section, we’ll explore the steps and best practices for designing emotes, panels, overlays, and badges that not only look great but also resonate with your target audience.
How To Make Twitch Emotes
- Size and Format: Twitch requires emotes to be in PNG format with transparent backgrounds, and in three sizes: 28×28, 56×56, and 112×112 pixels. They should be under 1MB in size. You might want to start with a canvas size of around 450×450 pixels, which would allow you to work with more detail, and then you can scale down as needed.
- Design Tips: Emotes are tiny, so clarity and simplicity are key. Focus on bold lines, distinct shapes, and limited colors to ensure your design is recognizable even at the smallest size.
- Concept Development: Take a look at different streamer channels to get a general idea of the themes used for their emotes. Many people choose a single animal, creature, or fictional character or franchise to base their emotes on. If you’re going to be working for a specific streamer in mind, start by brainstorming ideas that reflect the streamer’s personality, brand, or inside jokes within their community. Sketch out multiple ideas before settling on a final design, and you may want to consider using colors that align with the streamer’s overall branding. Bright and contrasting colors work well, as they make the emote stand out. If you’re creating a set of emotes, ensure they have a consistent style.
- Testing for Clarity: Before finalizing your emote, shrink it down to the smallest size to check if it remains clear and recognizable. Make adjustments as needed to enhance visibility.
How To Make Twitch Panels
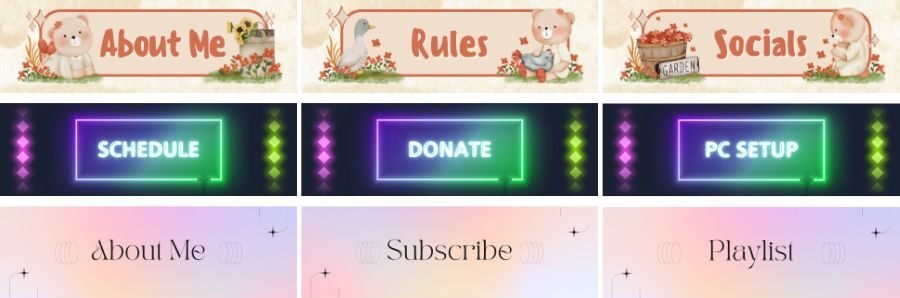
- Size and Format: Panels on Twitch are usually 320×320 pixels but can vary depending on the streamer’s layout. They can actually vary a lot in both size and shape, but if you’re only just starting, you may want to stick with the standards in order to appeal to a broader audience. PNG or JPG formats are commonly used.
- Design Tips: Panels should be visually consistent with the streamer’s overall branding and should clearly communicate their intended purpose, whether it’s for social links, donation information, or stream rules. Ensure that any text on the panels is large enough to be read easily, even on smaller screens. Even if you don’t know who is going to be your potential client, a good way to choose a style could be to simply choose a few streamers that you like, and design the graphics you think would fit with their branding aesthetics.
- Concept Development: Start by identifying the essential information a streamer may want to convey. I’d suggest you keep a list of the most used panels, such as “About”, “Schedule”, “Donations”, and “Social Media”, to name a few, so you make sure to cover all your basics. Consider using consistent fonts, icons, and border styles to create a cohesive look across all panels.
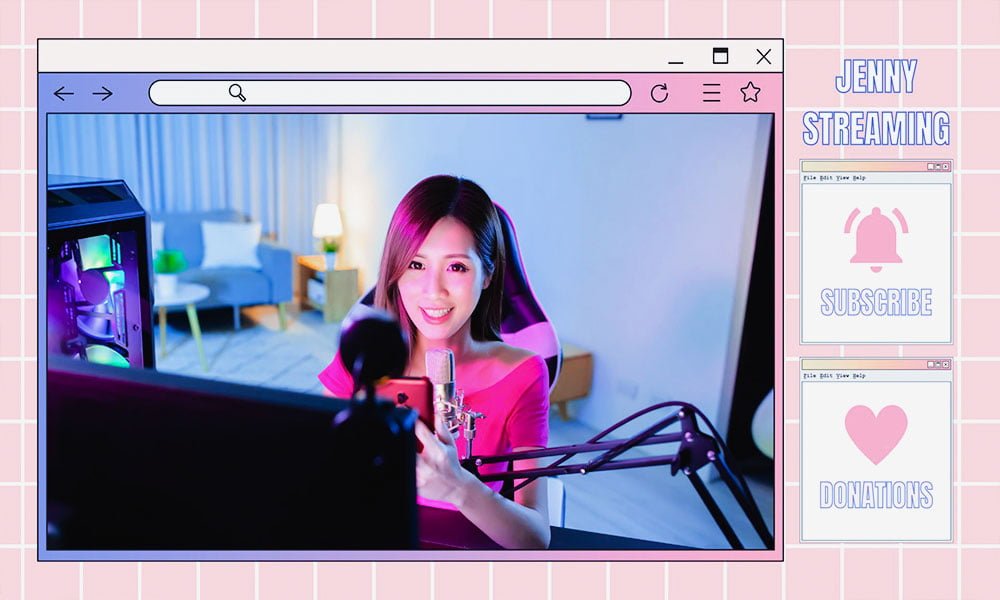
How To Make Twitch Overlays
- Resolution and Format: Overlays should be designed in 1080p (1920×1080 pixels) resolution to match the standard streaming output. They can be saved as PNGs with transparent backgrounds or as video files if animations are included.
- Design Tips: Overlays should enhance the stream without overwhelming the content. Keep them minimalistic and aligned with the streamer’s branding.
- Concept Development: Overlays often include elements like webcam frames, alerts, and stream labels. Plan the layout carefully to ensure it doesn’t distract from the gameplay or streamer’s face. The color scheme should be consistent to match a potential buyer’s branding. Consider making multiple sets of the same overlays, but changing their color palettes to have bigger chances of getting sales.
How To Make Twitch Badges
- Size and Format: Twitch badges must be provided in three sizes: 18×18, 36×36, and 72×72 pixels, in PNG format with a transparent background. The maximum file size is 25KB per image.
- Design Tips: Badges represent a viewer’s status in the channel, so they should be designed to be visually distinct and easily recognizable at small sizes. As with emotes, test your badge designs at their smallest size to ensure they remain clear and distinguishable.
- Concept Development: Badges often reflect the progression or loyalty of a viewer; the longer they’ve been subbed to a streamer’s channel, the higher their subscriber tier. Consider creating a set of badges that evolve visually over time to reward long-time subscribers or moderators. Similar to emotes, badges should use bold lines and simple shapes. Avoid intricate details that may be lost at smaller sizes.
Pricing and Marketing Your Work
Once you’ve created a small portfolio of Twitch graphics, the next step is to price your work appropriately and market it to potential buyers.
Tips for Pricing Your Work
Before setting your prices, it’s important to know the current market rates for Twitch graphics. Spend some time researching what other designers are charging for similar services. Look at platforms like Fiverr, Etsy, and social media where other artists might be promoting their work.
- Skill Level and Experience: If you’re just starting, it might make sense to set your prices slightly lower to attract your first clients. As you gain experience and build a reputation, you can gradually increase your rates.
- Complexity of Design: Not all emotes or overlays are created equal. More intricate designs or custom animations should be priced higher than simpler, static graphics. Consider the time and effort required for each project when determining your rates.
- Bundle Deals: Offering packages can be an effective way to attract clients who need multiple graphics. For example, you could offer a discount for purchasing a set of emotes or a complete branding package that includes emotes, panels, overlays, and badges.
Tips for Marketing Your Work
Your success as a designer depends heavily on how well you market yourself. Start by establishing an online presence that showcases your work and makes it easy for potential clients to find you.
- Social Media: Use platforms like Twitter, Instagram, and TikTok to share your designs, engage with the Twitch community, and attract new clients. Regularly posting your work and interacting with potential customers can significantly increase your visibility. Don’t forget to add watermarks to your posts to prevent people from simply downloading and using your designs without your knowledge.
- Selling on Etsy: Etsy is a fantastic platform for selling digital goods like Twitch graphics, as it allows you to reach a broad audience and manage transactions easily. If you haven’t already, check out my guide for selling on Etsy, which covers everything from setting up your shop to optimizing listings.
- Portfolio Website: Once you’re starting to get some recognition, consider creating a professional website that highlights your best work, outlines your services, and provides contact information. WordPress makes it easy to build a professional portfolio site, even if you’re not a web developer. I highly recommend Hostinger as your hosting company (it’s the one I use for this site), since it’s both affordable and user-friendly. Click here to create a site with Hostinger and get a 20% off discount.
- Twitch Community: Engage with streamers and viewers on Twitch. Join Discord communities or Twitter threads where streamers discuss their needs for graphics. By actively participating in these spaces, you can build relationships and gain referrals.
- Specialized Platforms: In addition to your website and social media, consider listing your services on platforms specifically designed for streamers, such as OWN3D or Streamlabs. These marketplaces can help you reach a targeted audience actively looking for Twitch graphics.
Conclusion
Turning your creative skills into a profitable business by making and selling Twitch graphics is not only achievable but can also be incredibly rewarding. Remember to price your work fairly, stay current with trends, and enjoy the creative journey.